TypeScript 入门
React 框架入门
调试 Vite 部署的项目
下面会以 plaidCTF_2023 中的 Davy Jones’ Putlocker Dubs 为示例说明如何进行本地调试。源码下载链接
项目结构
拿到项目的源码之后。首先应该查看源码目录结构。
└─$ tree -L 2
.
├── docker-compose.yml
├── misc
│   └── init.sql
├── package.json
├── packages
│   ├── client
│   └── server
├── README.md
├── tsconfig.base.json
├── tsconfig.dom.json
├── tsconfig.node.json
├── turbo.json
└── yarn.lock
该目录是一个典型的 react monorepo 项目结构,Monorepo 项目结构指的是将多个相关的项目放在一个仓库中管理的项目结构。具体来说,monorepo 项目结构通常包括一个顶级的仓库,该仓库包含多个子项目,每个子项目可能是一个库、一个应用程序、一个模块等等。通常,子项目之间会共享一些代码、工具和配置。我们可以打印出更加详细的目录结构,可以发现 client 和 server 是其下的子项目,有着各自的源码和配置文件。
.
├── docker-compose.yml
├── exp.py
├── misc
│   └── init.sql
├── package.json
├── packages
│   ├── client
│   │   ├── assets
│   │   ├── Dockerfile
│   │   ├── index.html
│   │   ├── nginx.conf
│   │   ├── package.json
│   │   ├── public
│   │   ├── src
│   │   ├── tsconfig.json
│   │   └── vite.config.mjs
│   └── server
│       ├── build.mjs
│       ├── Dockerfile
│       ├── package.json
│       ├── README.md
│       ├── src
│       └── tsconfig.json
├── README.md
├── tsconfig.base.json
├── tsconfig.dom.json
├── tsconfig.node.json
├── turbo.json
└── yarn.lock
与简单的 react 项目结构有所不同。一个简单的 React 应用程序,其结构通常如下:
├── package.json
├── public
│   ├── favicon.ico
│   ├── index.html
│   └── manifest.json
├── src
│   ├── App.css
│   ├── App.js
│   ├── App.test.js
│   ├── index.css
│   ├── index.js
│   ├── logo.svg
│   └── serviceWorker.js
└── yarn.lock
两种类型的项目在编译时使用的命令也不相同:
yarn run build是针对传统单一的代码库。yarn turbo run build针对 monorepo 结构的项目。
项目的编译与部署
从 Dockerfile 的行为我们可以进一步分析这个题目是怎么编译部署起来的。
- 编译使用
yarn turbo run build --scope=@davy/server或者 yarn build 命令进行 build。- 该命令会在项目根目录下找到 package.json 文件中的 “scripts” 字段,在其中查找 “build” 命令,并执行相应的脚本。如果没有配置 “build” 命令,运行 yarn build 命令可能会报错。
- 通过观察可以发现 server 的 packeage.json 中 build 指令执行的是
node build.mjs,client 中执行的是vite build
- 通过观察可以发现 server 的 packeage.json 中 build 指令执行的是
- –scope 参数有什么用处?
- –scope 选项用于指定需要执行的脚本所在的模块或子模块。在 monorepo 项目中,通常会存在多个模块或子模块,每个模块或子模块都有自己的依赖和脚本。如果不指定 –scope,则 yarn turbo run build 会在整个 monorepo 项目中查找符合条件的脚本并执行,这样可能会执行到其他不需要的模块或子模块的脚本
- 什么是 vite?
- Vite 是一个面向现代浏览器的构建工具,它利用了 ES modules 原生支持的特性,通过将代码拆分成更小的模块,从而实现了更快的热更新和更快的构建速度。
- vite.config.js 或 vite.config.mjs 的文件,用于配置 Vite 的行为。
- vite build 会在项目中查找 vite.config.js 或 vite.config.mjs 文件,并根据配置文件中的设置构建你的项目。
- 该命令会在项目根目录下找到 package.json 文件中的 “scripts” 字段,在其中查找 “build” 命令,并执行相应的脚本。如果没有配置 “build” 命令,运行 yarn build 命令可能会报错。
- 部署项目
- 在 server 中,tsconfig.json 指定了编译后输出的路径为 dist,build.mjs 指定了输出的文件为 dist/index.mjs,编译好 index.mjs 后就可以使用命令
node index.mjs来运行了。 - 在 client 中,tsconfig.json 指定了编译后输出的路径为 dist, vite build 会根据 vite.config.mjs 生成编译好的文件。编译好的文件直接放到 nginx 站点根目录下既可以运行。
- 需要注意的是,client vite.config.mjs 里的配置项如下,意思是说 client 启动时会监听 7008 端口,proxy 表示访问 /grapql 时会转发到 http://localhost/graphql,由于 nginx 也作了反向代理的配置,因此最终会被转发到 server。
 	server: {
    port: 7008,
    proxy: {
      "/graphql": {
        target: "http://localhost",
      }
    }
  }
- 在 server 中,tsconfig.json 指定了编译后输出的路径为 dist,build.mjs 指定了输出的文件为 dist/index.mjs,编译好 index.mjs 后就可以使用命令
本地部署并调试 Davy Jones’ Putlocker Dubs
题目的 docker-compose.yaml 如下:
version: "3.7"
services:
  postgres:
    image: postgres:15
    restart: always
    environment:
      POSTGRES_PASSWORD: postgres
    volumes:
      - ./misc/init.sql:/docker-entrypoint-initdb.d/init.sql
      # uncomment this line to persist data
      # - ./data:/var/lib/postgresql/data

  server:
    image: davy-jones-locker/server:latest
    build:
      context: .
      dockerfile: packages/server/Dockerfile
    restart: always
    environment:
      PG_URL: postgres://postgres:postgres@postgres:5432/postgres
      PUBLIC_HOST: ${HOST:-localhost}
      PUBLIC_PORT: ${PORT:-80}
      JWT_SECRET: ${JWT_SECRET:-secret}
      FLAG: ${FLAG:-PCTF{fake_flag}}

  client:
    image: davy-jones-locker/client:latest
    build:
      context: .
      dockerfile: packages/client/Dockerfile
    restart: always
    ports:
      - ${PORT:-80}:80
    environment:
      - HOST=${HOST:-localhost}
从 docker-compose.yaml 中可以看出,Davy Jones’ Putlocker Dubs 这道题包含了三个部分:
- postgresql
- server
- client
进一步分析源码可知,client 使用 React 框架进行开发,编译之后放在 nginx 中,用于前端展示内容,server 是一个使用 TypeScript 编写的 graphql API 服务器,client 需要获取内容时,会向 server 发送 graphql 请求,server 接收到请求之后,查询 postgresql 数据库后再进行响应。
graph LR
    subgraph docker1 [Docker_Container]
        client[Client<br>React + Nginx<br>]
    end
    subgraph docker2 [Docker_Container]
        server[Server<br>TypeScript +<br> GraphQL]
    end
    subgraph docker3 [Docker_Container]
        postgres[Postgres<br>Database]
    end

    client -->|GraphQL <br> Request| server
    server -->|PSQL <br>Query| postgres

    class client,server,postgres component
    classDef component fill:#f9d3a3,stroke:#333,stroke-width:2px,font-size:14px;
从源码结构来看也可以知道 server 和 client 是以 monorepo 的结构组织的,本地调试时为了方便实际上可以将单个子项目分离出来分别进行调试。
分开部署之后的架构图如下所示:
graph LR
    subgraph "192.168.137.131:7008"
        client[Client React<br>]
    end
    subgraph "192.168.137.131:8883"
        server[Server<br>TypeScript +<br> GraphQL]
    end
    subgraph "192.168.137.131:5432"
        postgres[Postgres<br>Database]
    end

    client -->|GraphQL <br> Request| server
    server -->|PSQL <br>Query| postgres

    class client,server,postgres component
    classDef component fill:#f9d3a3,stroke:#333,stroke-width:2px,font-size:14px;
本地部署 postgresql
(当然,直接使用 docker 也是可以的) 在 ubuntu 中可以使用下面的命令安装 postgresql
apt-get install postgresql postgresql-contrib
使用 postgresql 时,可以先切换到 postgres 用户,然后执行 psql 即可进入命令行。
su postgres
psql
由于题目在 docker-compose.yaml 中设置了 postgresql 的密码以及数据库文件,因此我们需要对本地的 postgresql 也进行修改。
services:
  postgres:
    image: postgres:15
    restart: always
    environment:
      POSTGRES_PASSWORD: postgres
    volumes:
      - ./misc/init.sql:/docker-entrypoint-initdb.d/init.sql
因此本地需要修改 postgres 密码为 postgres 并导入数据库。
su postgres
psql -f init.sql
psql -c "ALTER USER postgres PASSWORD 'postgres'"
部署 server
为了调试分析 TypeScript,首先可以先使用 yarn 进行编译:
yarn run build
编译后可在 dist/ 下看到生成的 index.mjs 和 index.mjs.map。
vscode 需要添加对应的 lauch.json,lauch.json 中加入如下的内容:
{
    // Use IntelliSense to learn about possible attributes.
    // Hover to view descriptions of existing attributes.
    // For more information, visit: https://go.microsoft.com/fwlink/?linkid=830387
    "version": "0.2.0",
    "configurations": [
        {
            "type": "node",
            "request": "launch",
            "name": "Launch Program",
            "skipFiles": [
                "<node_internals>/**"
            ],
            "program": "${workspaceFolder}/dist/index.mjs",
            "sourceMaps": true
        }
    ]
}
其中 program 需要指定为生成的 js 文件。
docker-compose.yaml 中定义了 server 运行时需要的一些环境变量:
  server:
    image: davy-jones-locker/server:latest
    build:
      context: .
      dockerfile: packages/server/Dockerfile
    restart: always
    environment:
      PG_URL: postgres://postgres:postgres@postgres:5432/postgres
      PUBLIC_HOST: ${HOST:-localhost}
      PUBLIC_PORT: ${PORT:-80}
      JWT_SECRET: ${JWT_SECRET:-secret}
      FLAG: ${FLAG:-PCTF{fake_flag}}
在 vscode 中调试时需要修改 PG_URL 指向本地。在 vscode 中可以通过 lauch.json configuration 中的 env 字典来添加环境变量:
  "env": {
    "PG_URL": "postgres://postgres:postgres@127.0.0.1:5432/postgres",
    "PUBLIC_HOST": "192.168.137.131"
  }
另外,如果想要在 TypeScript 源码中进行调试,就还需要在 tsconfig.json 中加入 sourceMap
{
  "extends": "../../tsconfig.node.json",
  "compilerOptions": {
    "outDir": "dist",
    "sourceMap": true,
    "experimentalDecorators": true,
    "emitDecoratorMetadata": true,
    "strictPropertyInitialization": false
  },
  "include": ["src"]
}
注意,由于 nginx 已经监听了 80 端口,因此需要将 graphql 监听的端口换一下,需要修改 index.mts 中的 port。
startStandaloneServer(server, {
	listen: {
		port: 8883
	},
	// eslint-disable-next-line @typescript-eslint/require-await
	context: async ({ req }): Promise<Context> => {
		const token = req.headers.authorization;

		if (token === undefined) {
			return {};
		}

		try {
			const user = verifyUserToken(token);
			return { user };
		} catch (e) {
			return {};
		}
	}
});
更换之后, 注意重新编译:yarn build.
使用 f5 启动调试,此时 8883 端口已经开启了监听,直接使用浏览器访问会显示出 Apollo Server。通过 Apollo Server 可以很便捷地查看所有的 API 定义以及数据类型,直接在界面上操作即可发起请求。
我们可以测试一下调试功能:在 index.mts 的 register 函数中下一个断点,然后使用 Apollo Server 发起一个注册请求,即可在 vscode 中断下。

部署 client
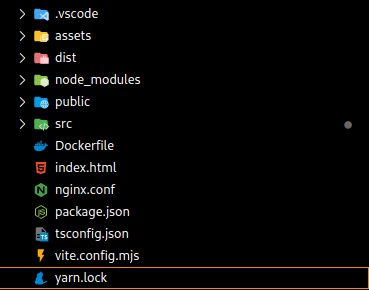
创建一个空的文件夹,然后将 client 的源码放进去,使用 vscode 打开。
使用 yarn install 安装需要的库。
安装扩展:
- JavaScript Debugger Companion Extension
React 在运行时可以使用 –debug 开启调试信息以便于查看程序具体的运行状态,可以在 package.json 的 scripts 处将 dev 的命令进行修改,在 vite 命令后添加参数 –debug
  "scripts": {
    "typecheck": "tsc --noEmit",
    "build": "vite build",
    "clean": "rm -rf dist",
    "dev": "vite --debug",
    "dev:public": "vite --host 0.0.0.0",
    "lint": "eslint --fix --ext .tsx src"
  },
使用 npm run dev 即可运行该项目,但默认情况下监听 127.0.0.1,如果需要进行更改,可以在 vite.config.mjs 中进行修改,此时服务运行起来之后将会监听 0.0.0.0:7008 端口,访问 /graphql 时会转到 http://localhost/graphql:8883 (这里的 8883 端口为上一步配置的 graphql 服务器监听的端口)
server: {
  host: "0.0.0.0",
  port: 7008,
  proxy: {
    "/graphql": {
      target: "http://localhost:8883",
    }
  }
}
项目运行起来之后,我们就需要在 vscode 中进行配置,在 lauch.json 中输入 chrome 以便弹出补全提示,最终的配置如下:
{
    // Use IntelliSense to learn about possible attributes.
    // Hover to view descriptions of existing attributes.
    // For more information, visit: https://go.microsoft.com/fwlink/?linkid=830387
    "version": "0.2.0",
    "configurations": [
        {
            "name": "Launch Chrome",
            "request": "launch",
            "type": "chrome",
            "url": "http://192.168.137.131:7008",
            "webRoot": "${workspaceFolder}",
            "sourceMaps": true,
            "sourceMapPathOverrides": {
                "webpack:///src/*": "${webRoot}/src/*"
            }
        }
    ]
}
需要注意的几个配置:
- url:填写 React 服务的地址。
- webRoot:定义 web 根目录。
- sourceMaps:开启源码映射。
- sourceMapPathOverrides:用于远程调试的最重要的一个配置,映射本地源码的路径信息。
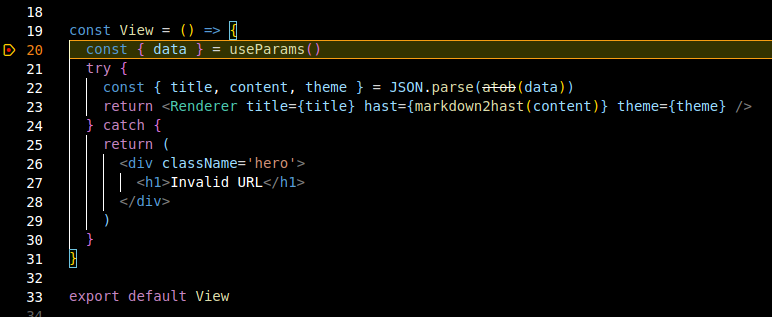
配置好之后就可以使用 f5 运行调试,可以尝试在 src/views/Home/Home.tsx 中下一个断点,然后在启动的 chrome 浏览器中访问对应的页面:

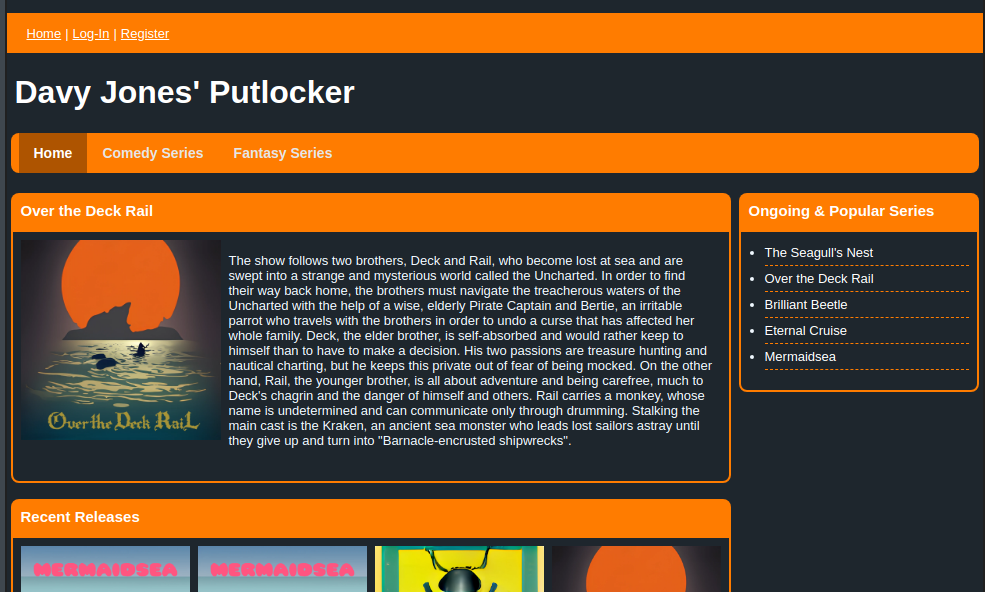
放行之后能够正常得到页面:
调试 create-react-app 部署的项目
MDBIN 是 redPwnCTF 2021 的一道 react 框架 web 题,这里将演示如何使用 vscode 对其进行调试。在我的环境中,使用 kali 的 vscode 远程连接(Remote-SSH 插件)到 ubuntu 虚拟机中,项目部署在 ubuntu 中。
从项目结构上可以看出这是一个 React 项目,项目的结构如下:
.
├── docker-compose.yaml
├── Dockerfile
├── nginx.conf
├── package.json
├── package-lock.json
├── public
├── README.md
├── src
首先安装依赖包:
npm install
然后看 package.json 中 script 部分的内容。
  "scripts": {
    "start": "react-scripts start",
    "build": "react-scripts build",
    "eject": "react-scripts eject"
  },
这个项目与 Davy Jones’ Putlocker 非常相似,区别在与后者使用了 Vite 进行创建,而前者使用 create-react-app 项目进行构建。
create-react-app 和 Vite 都是用于快速构建和开发 React 项目的工具,但它们在技术实现和特性上有所不同。
-
create-react-app: create-react-app 是一个用于创建单页 React 应用程序的脚手架工具。它提供了一套预先配置好的工具集,包括 Webpack、Babel 和 ESLint 等,帮助开发者快速启动新项目,无需自己进行繁琐的配置。它的主要优势在于开箱即用的特性,让开发者可以专注于编写应用程序代码。
-
Vite: Vite 是由 Vue.js 作者尤雨溪创建的一个更现代、更快速的 Web 开发构建工具。Vite 使用了原生 ES 模块(ESM)作为开发服务器,允许浏览器直接加载模块,这样可以实现极快的开发环境启动和热更新。Vite 同样支持多种框架,包括 Vue、React 和 Svelte 等。Vite 使用 Rollup 进行生产环境的构建,可以获得高效的构建结果。
在 Davy Jones’ Putlocker 的 client 中,我们在 vite 启动时加入了 –debug 参数,在 create-react-app 中,如果要开启调试,需要将 scripts 中的 start 进行更改:
  "scripts": {
    "start": "node --inspect=0.0.0.0:9229 node_modules/react-scripts/bin/react-scripts.js start",
    "build": "react-scripts build",
    "eject": "react-scripts eject"
  },
添加 inspect 参数后可以在运行 npm start 时监听 9229 端口。
此时我们可以在终端中运行 npm start 将项目运行起来。由于我是远程连接到 IP 地址为 192.168.137.131 的 ubuntu 中运行这个项目,项目运行起来之后会打印如下的信息,并自动开启本地(kali)的浏览器进行访问,访问的端口为 3001。
Compiled successfully!

You can now view mdbin in the browser.

  Local:            http://localhost:3000
  On Your Network:  http://192.168.137.131:3000

Note that the development build is not optimized.
To create a production build, use yarn build.
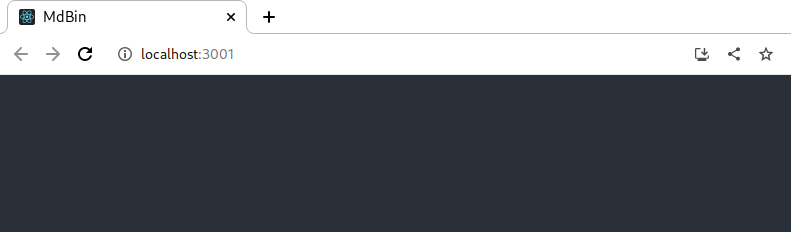
自动启动的浏览器界面并不是 vscode 调试器启动的,因此可以直接关掉。
接着在 vscode 中添加 launch.json 文件,在其中添加 chrome 浏览器调试配置。
{
    // Use IntelliSense to learn about possible attributes.
    // Hover to view descriptions of existing attributes.
    // For more information, visit: https://go.microsoft.com/fwlink/?linkid=830387
    "version": "0.2.0",
    "configurations": [
        {
            "name": "Launch Chrome",
            "request": "launch",
            "type": "chrome",
            "url": "http://192.168.137.131:3000",
            "webRoot": "${workspaceFolder}/src",
            // "sourceMaps": true,
            // "sourceMapPathOverrides": {
            //     "webpack:///./*":   "${webRoot}/*",
            // }
        }
    ]
}
- url 为项目启动后的地址。
- webRoot 是 web 项目源码的位置。
- sourceMapPathOverrides 可以设置源码映射。
其中 sourceMapPathOverrides 配置用于调整源映射路径的解析规则,将 Webpack、Meteor 等打包工具生成的路径,映射到本地实际的路径,以便更好地与实际文件路径匹配。 一些示例如下:
"sourceMapPathOverrides": {
    "webpack:///./~/*": "${webRoot}/node_modules/*",       // Example: "webpack:///./~/querystring/index.js" -> "/Users/me/project/node_modules/querystring/index.js"
}
更具体的配置信息可以在 vscode-chrome-debug 进行查看。
实际上,使用 create-react-app 创建的 React 项目会自动处理源代码映射,无需手动配置 sourceMapPathOverrides。因此这里我将 sourceMapPathOverrides 进行了注释。
配置完成之后,在源码中下断点,按 f5 开启调试,此时会开启一个浏览器窗口,在页面中点击响应的逻辑就可以触发断点了。